MTB Repairs Guide

Ride enough rough stuff and a tear in your kit becomes inevitable. Included with most products from our MTB range, our at-home repair patch kits are a quick and easy solution to getting you and your kit back on the trail.

Rapha MTB repairs

No matter where your local trails are, every ride leaves its mark on your apparel as surely as your tyres leave tracks in the dirt. But Rapha Performance Trailwear is designed to last, lap after lap and season after season. And even if you do come off and rip an item of your kit, it’s not the end of the line.

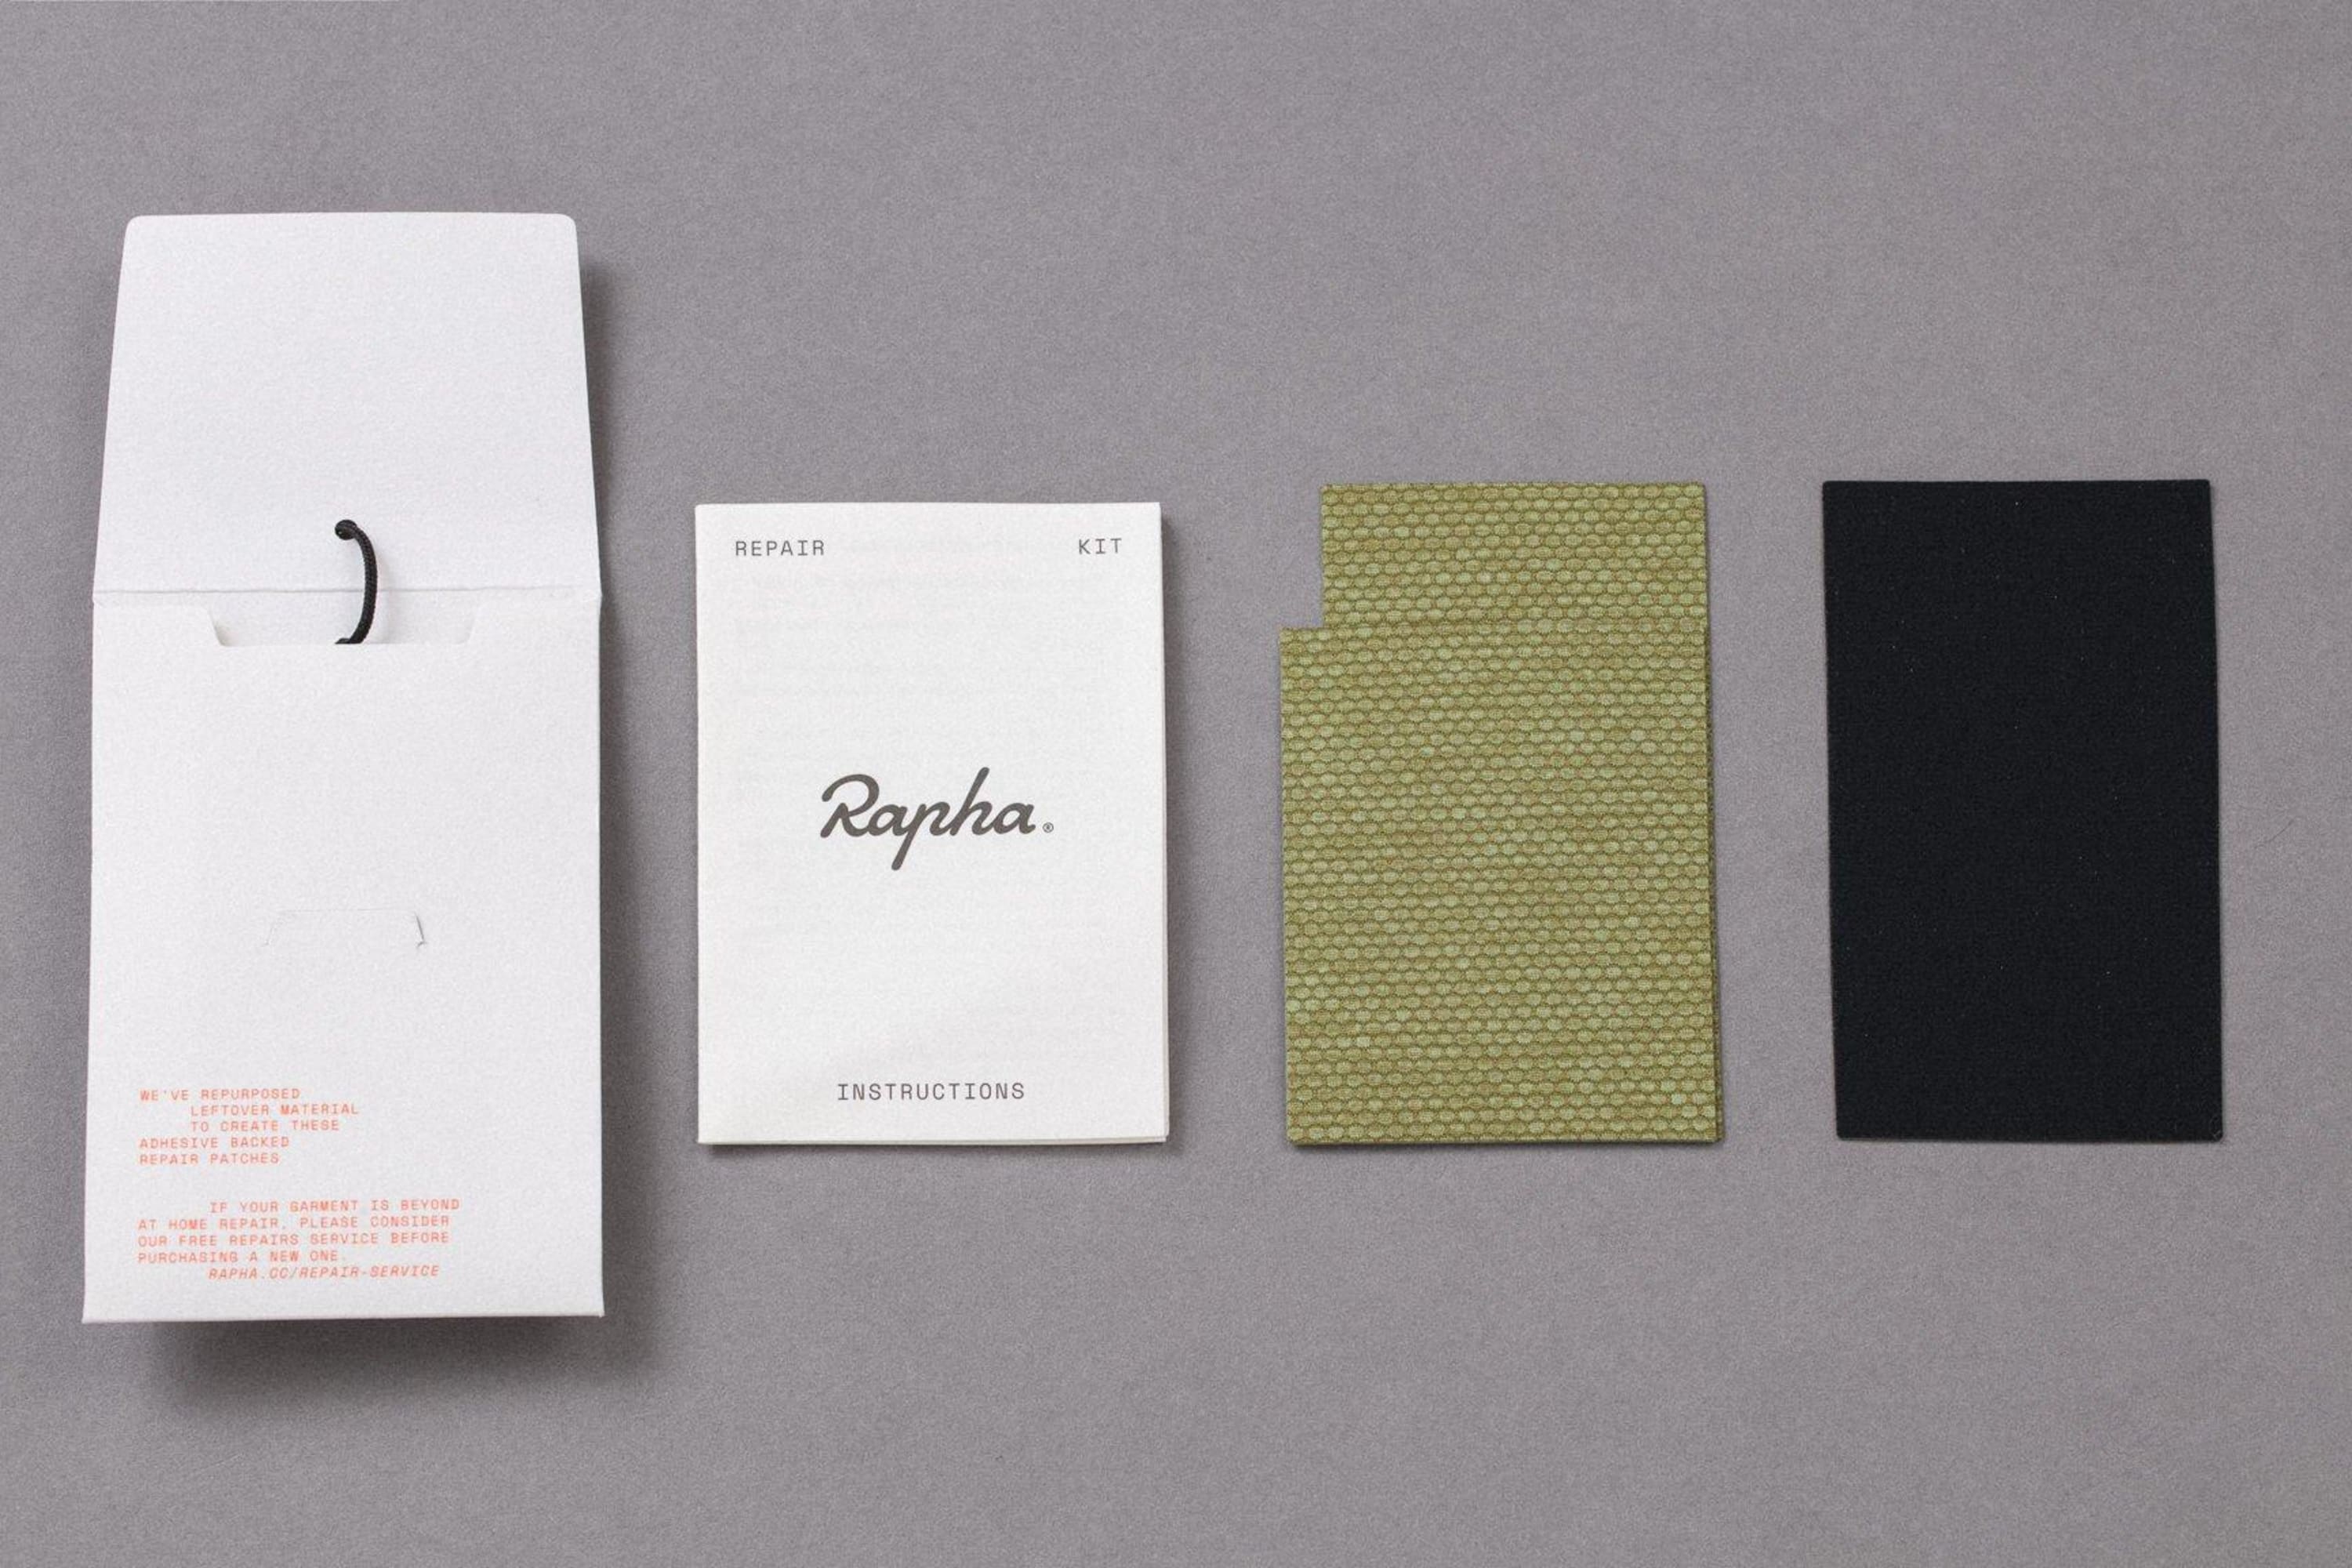
To help you get back on the trail as quickly as possible in the event of a crash, we’ve included an integrated repair kit with as many pieces of Rapha Performance Trailwear as possible. Keep reading to find out what’s in the repair patch kits and how to use what’s inside.

Many products from our MTB range already incorporate environmentally preferred materials, but our repair patch kits also help us use up surplus fabric that is too small to make garments from – saving waste and further decreasing each garment’s environmental footprint. After the repair patches are cut from the excess fabric of the manufacturing process, an adhesive layer is bonded to the back of one side, ready to be activated by an everyday laundry iron. Once the patch is secured in place, you and your apparel are ready to get back to the trail.

WHAT’S INSIDE?

Repairing your torn garment is easy. All you need is an iron, an ironing board and a large saucepan. Follow these eight straightforward steps to achieve the best results:

1. Ensure the affected area is clean and free of dirt or oil.

2. Set clothing iron to Temperature Low or Wool setting (250F–300ºF).

3. Gently press the warm iron on the affected area, ensuring that the damaged portion of the garment is as flat as possible.

4. Remove the wax paper backing from your repair patch and place it on top of the damaged area. Ideally, the patch should extend 5mm beyond the tear to the original fabric on all sides.

5. Set the waxed paper over the repair patch.

6. Place the iron over the waxed paper and repair patch and gently apply heat using a circular motion for 60 seconds. Keep the iron moving to avoid damaging the garment.

7. For best results, cool the area by placing a large saucepan filled with cold water over the repair for five minutes.

8. Allow 24 hours before washing the garment.

If your garment has suffered more damage than can be remedied by using the repair patches provided, please consider using our free repairs service before purchasing a new one.

FREE REPAIR SERVICE

Available with most Rapha products, our free repair service ensures you get the most from your Rapha garment. Simply fill in the online form on our Repair Service page, detailing your garment and the damage in need of repair. Once you’ve submitted the form and sent the garment to be repaired, allow up to four weeks for the return of your repaired garment. The service applies to garments outside the 30-day return policy, though some garments are excluded.

Find out more